This documentation is for the purpose of registering for new course(s) on WireD using Schedule Planner to identify course(s) and course schedule options or to register for course(s) without the use of Schedule Planner that have been identified with your academic advisor.
To follow these instructions you will need your Alternative PIN (AVN), found on your advisement sheet.
- Login to your Student Dashboard in WIReD
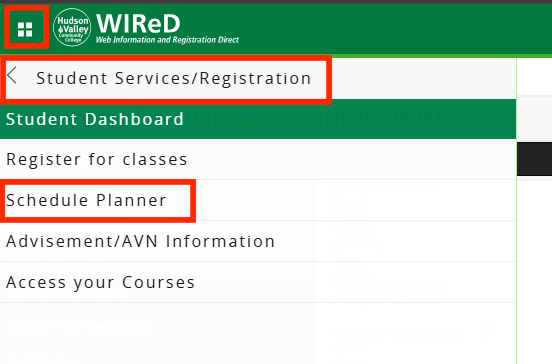
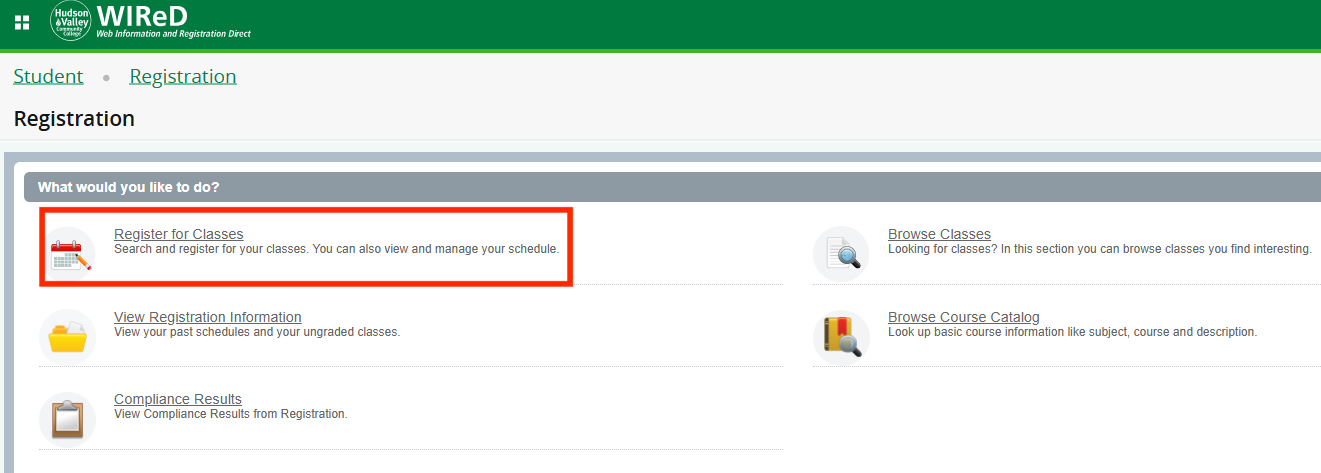
- Select Registration from the left side menu.

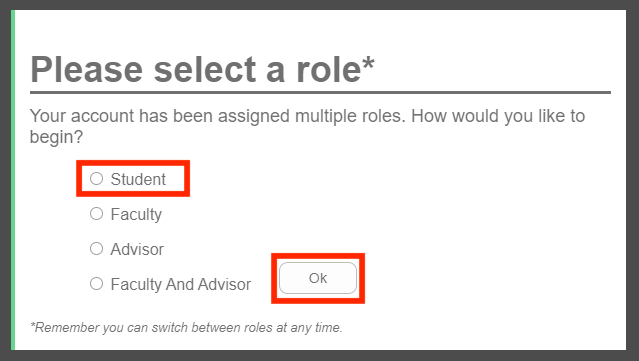
- In the "Please select a role" view, select Student then select Ok.
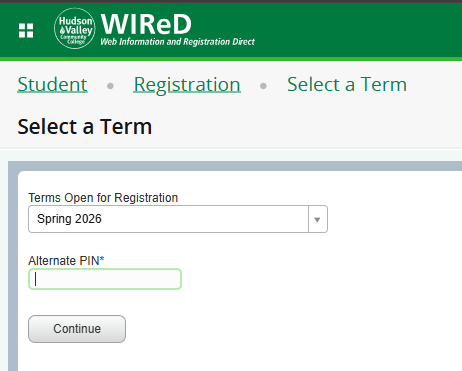
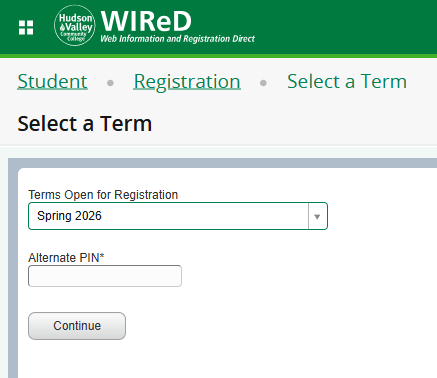
- Next select your Term and enter your Alternate Pin (AVN). Select Continue.
- To review schedule possibilities based on your preferences, select the Schedule Planner link on the menu instead of Register for classes and continue to step 12.
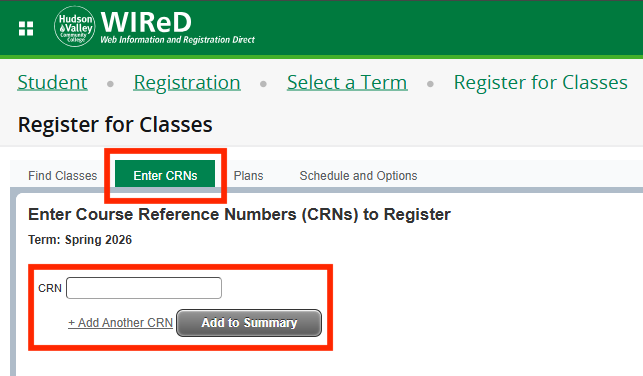
- If you already have CRNs, select the Enter CRNs tab.
- Enter your first CRN and then select Add to Summary. Enter any additional CRNs in the same way.
- Make sure that **Web Registered** is selected on the Action menu and then select Submit.
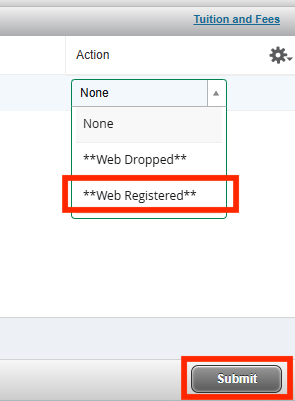
- Once satisfied with your schedule, select Submit in the bottom right.
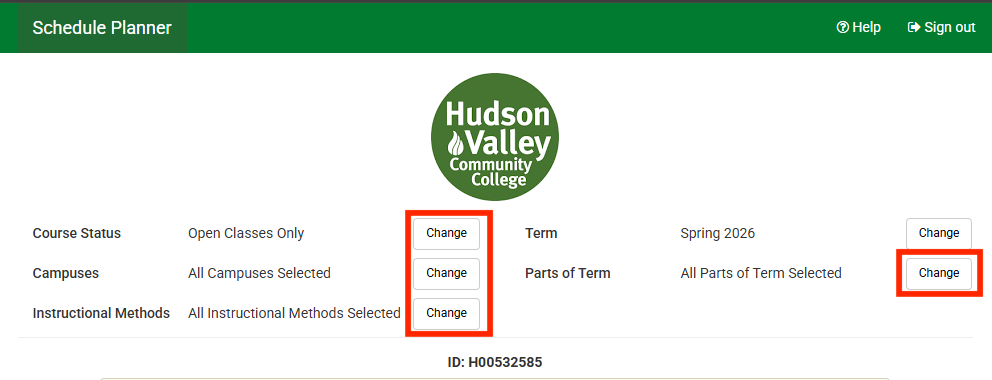
- You will be directed to the Schedule Planner. The appropriate term should be automatically populated based on previous actions. The optional filters at the top of the page can be used to limit your schedule to a particular location, instructional method, or part of term.
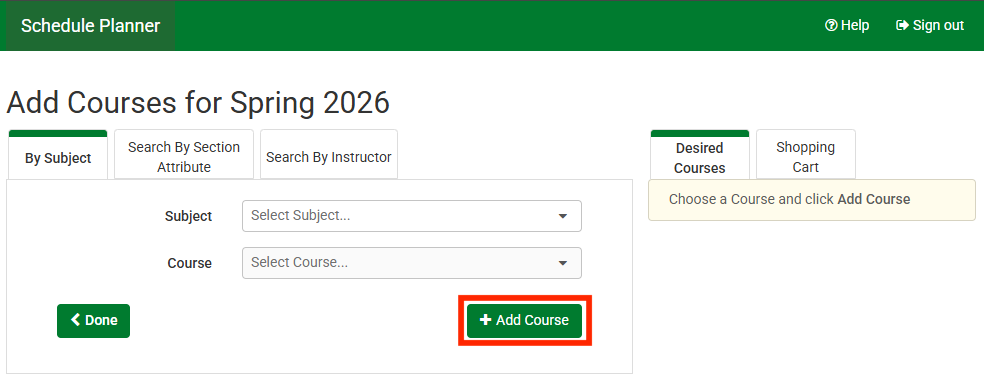
- Select the Add Course button.

- Use information from your advisor to search by subject and course number, section attribute, or instructor. To add a course to be included in your possible schedules, select the Add Course button. Do this for each course you want to include in your possible schedules. Once you have added all courses, select the Done button.
- If a course has reserved seats, you can view seat information for each section by selecting the round "i" icon in the sections view.
- If you are registering for a course with a lab, be sure to leave the boxes of both the lecture and the lab checked to include them in your possible schedules. (Ex. Sections 01 and 01A or 500 and 500A)
- Optional: Select the Add Break button to let the Schedule Planner know when you are not available to attend class due to other commitments.

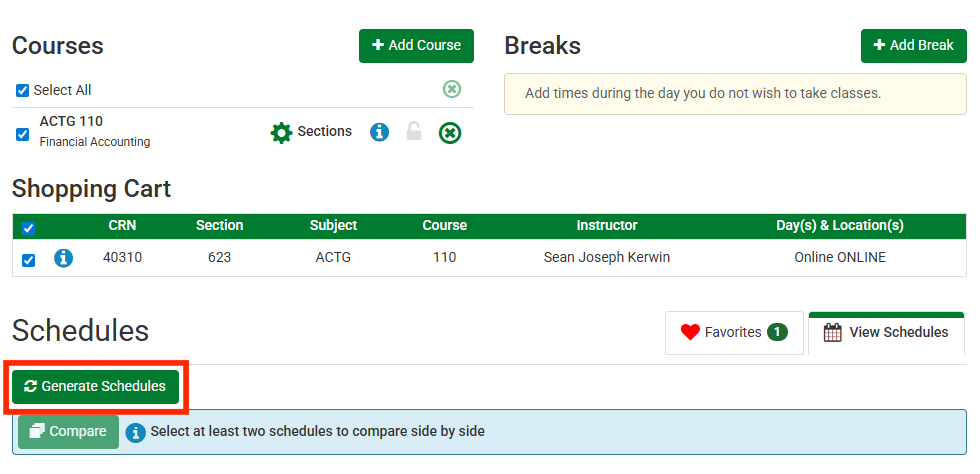
- When you are satisfied with your preferences, select the Generate Schedules button. Your possible schedules will appear. Hover over the magnifying glass for a visual schedule view or select the View link to see specific schedule information.
- When you find a schedule you want, select the Send to Shopping Cart button at the top of the page. Select Continue on the prompt that appears.
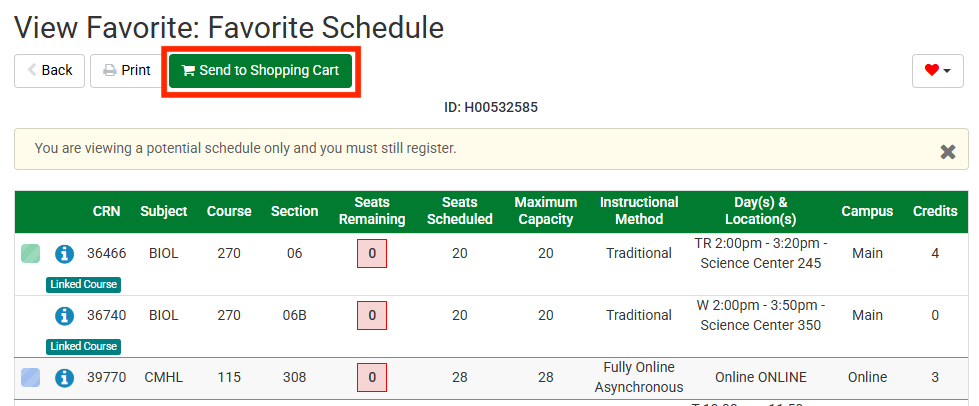
- The course sections in the schedule you chose will appears in the Scheduler Planner Registration Cart. Select the Register for Classes button to continue.
- Enter your term and Alternative Pin (AVN) and select Continue.
- Select the Plans tab to see the status of your schedule. The courses you are registered for will say "Web Registered" next to them. You may encounter a few different types of registration errors:
- Prerequisite and Test Score Error: This course has a pre-requisite. Your advisor must override this error.
- Reserve Closed or Field of Study Restriction - Major: Some seats are reserved for certain majors. If you get one of these errors, the section is closed to you.
- Linked Course Required: You must select the boxes next to both the lecture and lab to register for this course.
- If you are routed to the Registration Compliance Results page, you have scheduled a course that will not be covered by financial aid and you should consult your academic advisor.
- To register for courses that you are currently not registered for select Add in the Register from a plan panel. Select Action from the drop-down menu, and then select the Submit button.
Need More Help?
For assistance, please contact the Registrar's Office at: